Pitivi Software Review
Pitivi is a freely available video editing software which is available for Linux-based devices. It is licensed under the terms of GNU Lesser General Public License. Some of the notable features offered by Pitivi are simple but effective video editing capabilities, filters and effects, hundreds of transitions, availability in many languages and precision based video editing. It supports almost every video format and is available to users free of charge. Its key features include HD Support, multitrack editing, unlimited video and audio tracks, and linear timecode display.
History
Edward Hervey began working on PiTiVi in December 2003 as an end-of-studies project at the EPITECH engineering school in Paris. It was first written in C, its codebase was first scrutinized into version control in May 2004 and was recomposed in Python the following year. Fluendo hired Hervey, after he graduated, to work on GStreamer for the next two years, after which he founded Collabora’s multimedia department to ameliorate PiTiVi, GNonlin and GStreamer plugins for two years up to 2010. Pitivi took a long time to mature since Hervey had to ensure that GNonlin and GStreamer were stable and mature enough to use for his application.
Inclusion in the default set of Ubuntu applications
Pitivi 0.13.4 became the first default movie editor offered as part of the Ubuntu ISO CD following the launch of Ubuntu 10.04 Lucid Lynx in April 2010. It was announced in May 2011 that PiTiVi would no longer be included in the Ubuntu ISO, beginning with Ubuntu 11.10 Oneiric Ocelot’s launch in October 2011. It was removed because of poor user reception, lack of fit with the default user-case for Ubuntu, lack of development maturity and polish.
Rework
Edward Hervey declared the availability of GStreamer Editing Services (GES) in late 2009. Further confirmation to transfer PiTiVi to GES arose at the Meego forum in 2011, but it was after the release of 0.15 in September 2011 that Thibault Saunier officially declared that the proceeding PiTiVi publication would be based on GES. The initial version using GES was 0.91, which was published in October 2013. Because of the new engine, plenty of code could be scrapped, and PiTiVi codebase went through huge reorganization, refactoring and cleanup. During the last stages of these changes resulting in the release of version 0.91, the timeline was likewise altered to Clutter from the Canvas “GooCanvas”. Following the release of 0.91, PiTiVi was renamed to Pitivi without the “T” and “V” capitalized.
Fundraising
In February 2014, the project stated that it was seeking to raise €100,000 for further development and stabilization of Pitivi. Unfortunately, the fundraiser did not meet its target, raising around €23000 resulting in a partially funded development.
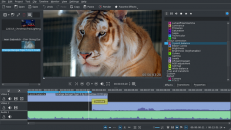
back to menu ↑Design and Interface
Pitivi has a simple interface that takes into account the newbie and seasoned filmmakers.
Importing Video Clips
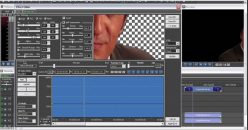
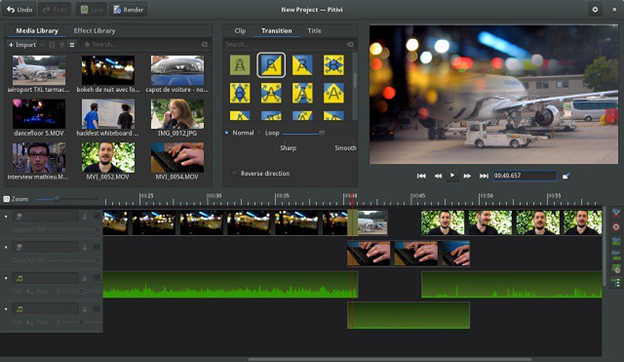
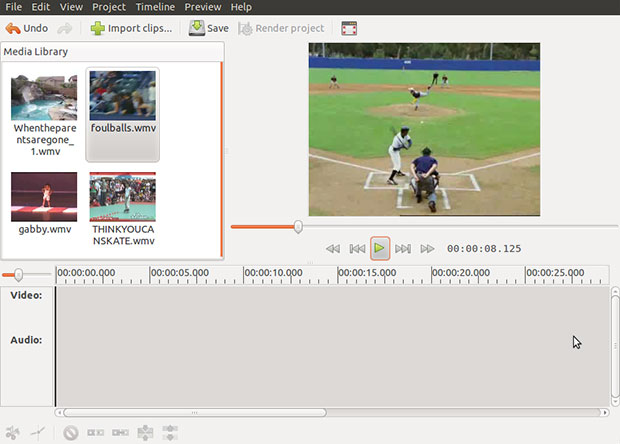
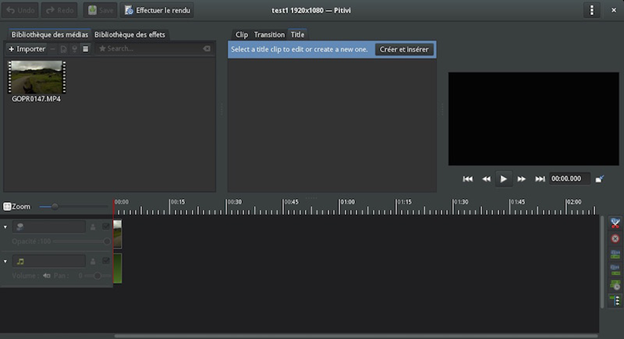
Its Graphical User Interface (GUI) makes Pitivi user-friendly. You can import video clips into Pitivi’s media library by clicking the import button and choosing the files you need to import and then clicking the Add button. Alternatively, you can drag the files into the media library box.
Accessing Imported Files
Video files display by their file name or thumbnail in the media library screen on the top left portion of the application’s display. Right clicking also enables you to access the imported file command and the remove clip command. The running view of the clip plays on the upper right section of the application window. The running clip has basic controls such as forward/reverse and start/pause/stop the playback. The right side of these buttons is the digital running time.
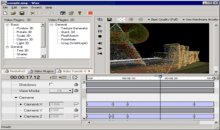
Video and Audio Segments
The bottom portion of the application window shows a timeline with the audio and video segments of the running clip. They are presented as a sequence of still previews. To edit, drag the video clip from the media library into the editing workspace below the line which also loads the video into the viewing window.
Features
Pitivi inherited its capabilities for exporting and importing (rendering) media from the GStreamer framework or the plugins for the GStreamer framework. It supports basic media editing capabilities such as trimming, splitting, snapping and cutting of clips. Audio mixing is supported by curves, envisaged as line segments drawn over an audio waveform. Pitivi can step through a piece of media using keyboard shortcuts or scrubbers. Video and audio clips can be connected and treated as a single clip. Initial support for video mixing (transitions and compositing) was added in late 2009 but is still ongoing massive work.
Animated Effects, Filters, and Transitions
When using Pitivi, you have access to more than 70 industry-standard transitions and over a hundred audio and video effects. You can add true dynamism to your videos by animating all the properties of effects over time with key frames.
Enhanced Audio Waveforms
Pitivi enables you to make a movie with a well-timed and balanced sound. It provides an accurate and clear representation of loudness, so that you can balance things out or easily detect patterns for clap synchronization, beat matching, or simply cutting to the music.
Framerate-independent timeline and true precision
Pitivi’s timeline is independent of framerate that allows you to use footage that has different framerate in one project. Also, it is accurate to the nanosecond, unlike other video editors that are only frame-accurate.
Automatic Project Backups
Once created, your project is safe with Pitivi. You can crash the entire computer or cut the power and Pitivi will give you the option to restore to the last automatic checkpoint. This ensures that your projects are safe through the automatic project backups.
Background Processing
Instead of disrupting your workflow, Pitivi generates waveforms and thumbnails in the background. This ensures that you work uninterrupted resulting in the production of a better movie.
back to menu ↑Usage
Non-linear editing typically means that you know what you are doing before you start doing it. Pitivi allows users to manipulate video clips and audio segments along a timeline and is not restricted by the chronology of imported files. Before editing, you need to first determine the preset for a timeline, for instance, 1080i or 720p which also include settings for the sound. Videos with funky measurements have a custom resolution entry
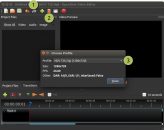
Once you have established the timeline, you can start importing files, video, and audio, and begin chopping and pasting the clips. Pitivi is defined by the power to apply effects in real-time, such as black and white, chroma support or gamma correction. Pitivi comes with dozens of plug-ins that include swirl, cartoon, bulge and other semi-professional such as Mask0Mate which creates a square alpha-channel mask. The layout of Pitivi is similar to that of Adobe Premiere.
The rendering in Pitivi is quite straightforward and simple. You can choose from a small number of presets such as Blu-ray, DVD, and iPod, but can still create your own presets, with a custom resolution and audio.
Hardware Requirements
You need a powerful computer when editing a video. Editing High Definition video requires a state of the art hardware which is dependent on the codec used. However, editing Standard Definition video is possible using modest computer hardware. The following are the system requirements for Pitivi:
- CPU with modern quad core
- Solid-state drive
- Intel graphics card
- Full High Definition (1920 x1080) capable monitor; resolutions below 1024×768 are not supported.
However, it is possible to use low-quality versions of your footage when editing and use high-quality hardware when rendering the final output, which helps you bypass the hardware limitations of Pitivi.
back to menu ↑Summary of the Pros and Cons
Pros
- Easy to use and learn
- Automatic project backup
- Background processing of thumbnails and waveforms
- High precision that is accurate to the nanosecond
- Frame-rate independent timeline
Cons
- It is only compatible with Linux
- Limited features when compared to other professional software
- Heavy reliance on GStreamer
In summary, Pitivi is a reliable software that supports many video formats and offers a quality video editing tool. Although it is an open source software, it is not compatible with Mac OS or Microsoft Windows which limits its usability. It only works with complex hardware such as quad core CPU and Intel graphics. However, it’s a free software, which saves you the money you would spend on buying a video editing software. It has video editing features such as animated effects, filters, and transitions, the enhanced waveform to enable you to balance loudness and cut audio files easily.
back to menu ↑8 Tips on Getting the Maximum Utility from Pitivi
Pitivi is a good video editing software, and you can use it to produce a quality movie. However, editing is usually the final process that occurs before a video gets to you for final viewing. Editing is a time-consuming process, and it requires your patience and skill. Nevertheless, you can produce a quality video easily using the best tips for using Pitivi.
Here are the 8 tips for making maximum utility from editing using Pitivi.
Create a Project Directory
You should create a project directory every time you start an editing project. Having a project directory enables you to work systematically without missing critical moments on the footage. Label each folder in the project directory according to the type of media contained therein. Doing this will help you access things quickly and save your time.
Trim the Fat
It is tempting to just toss a clip on your timeline and stop for the day. You should trim the start and end of a video to make it clean and find the next “hot” moment before you augment it. You should do this because no one is interested in watching an open field before the action starts. Trimming the fat makes the editing succinct and is a guarantee that your audience will find your movie entertaining.
Use a Second Source of Sound
You are always going to get clearer audio with something other than the camera. If possible, you should record your audio using a better microphone and separate the recording system then synchronize the recorded audio using Pitivi. Pitivi has enhanced waveform that enables you to balance the audio and minimize noise in the video.
Vary your Shots
Keeping your content visually interesting is yet another thing to consider. Instead of using the same shot for the entire video, attempt to vary things up with more interesting angles. You can achieve this by recording using two cameras and switching between them. However, you should use these cuts sparingly. You should make cuts based on the beat of the music or at pauses when people speak. Avoid cutting very fast to prevent your viewers from having an epileptic seizure.
Tell the Story
Do not forget to tell a story when editing. Take into consideration the beginning, middle, and end because they are the basics of storytelling. Make sure that your shots correspond to the story to provide a structure for the finished video.
Select the best Camera Viewpoints for each instant
As you edit your footage, your primary objective should be to balance the expectations of the audience with the speaker intent. Consider the areas the audience would want to be looking at in different points of the footage. By choosing these points, you will enable the actors better tell the story.
Avoid Wide Shots
It is important to cut between different camera viewpoints so that the viewers comprehend where the action is taking place. Medium shots and close-ups have the best impact on the viewers since they can see the body language and facial expressions of the actors.
Cut on the Action
Cutting on a gesture is one way of making the editing between two shots seem invisible. Viewers watch the beginning of motion which starts in a single shot and keep an eye on it as it crosses the edit and completes in the next shot. Completing the gesture masks the edit and makes the video more coherent.
Editing means a lot to any filmmaking venture; you should focus on the above eight tips to produce an eye-catching movie. While using Pitivi, you should avoid cutting very fast and focus on the best camera angles for each moment. This will help you make an outstanding video using Pitivi which is one of the easiest video editing software.