YouTube Video Editor Software Review
The YouTube video editor has been in use for almost a decade now. Originally, you could only conduct basic editing functions such as trimming and cutting clips, but now it’s an enhanced video editor with multiple effects and transitions. It is a simple to use software and does not require a sophisticated computer since it is a browser-based program. All you need is an internet connection and Flash Player plugin in your browser. However, it does not offer all features available on other video editors that make it unsuitable for some projects.
Features
The YouTube video editor comes with some basic video editing functions such as audio swap, splicing, and cropping videos. You first need to upload the videos to YouTube before you start editing. Besides your videos, YouTube gives you the option of using videos that are part of the Creative Commons library. Audioswap is easy to use, and you have access to the Creative Commons library in the editor.
Add Clips
All of your uploads are automatically added to the YouTube video editor and can be used as a clip. You can use as many as 50 clips and 500 images in a project to create a new clip. Get the image or clip you want to include on the upper left side of the editor. Then click the camera sign to browse images. To add a clip or image to an existing project, just move the cursor over the image or clip you want to add then select the + icon. To add a clip or image to a new project, drag the image or clip to the bottom of the timeline at the lowermost part of the editor.
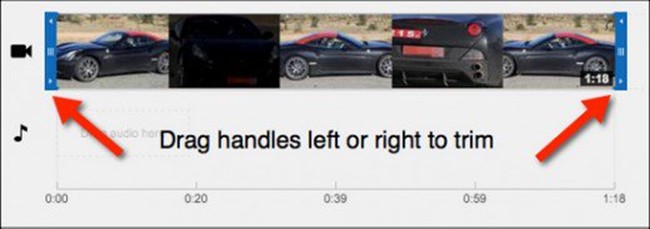
Trim
You can cut the length of your clip by moving the cursor over the edges of your video in the timeline. You only need to drag the handles towards the center of the video to shorten it.
Lengthen
The software allows you to make your video longer. To lengthen it, just drag the handles outwards from the center of the video. If you lengthen past the original length of the clip, there will be video repeating.
Cut/Snip
You can cut a clip into pieces. Hover the mouse over the clip and select the scissors image to bring up the snip marker. Move the icon to where you want to snip the clip, then click on the scissors button to snip the video.
Customize and Add Effects
YouTube video editor allows you to make some enhancements and tweaks to clips. You only need to move the mouse over a clip to bring up any of the following options:
- Rotate: This rotates the clip 90 degrees.
- Effects: You can use video enhancements on your clip to color correct, stabilize, and add effects and filters.
- Text: You can apply a text overlay on the video.
- Slow Motion: You can slow down the speed at which the video plays.
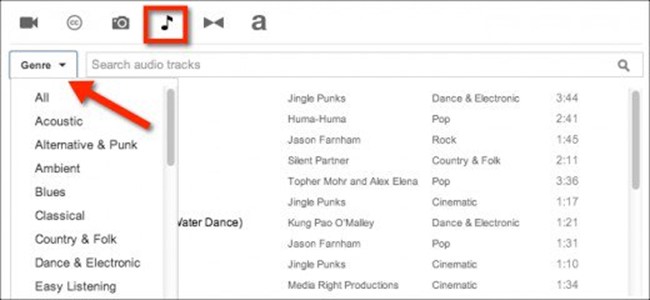
Add Music
The editor allows you to add a new audio track to your clip. Doing this, by default, replaces the original audio on the clip. Just select the music note icon at the top left of the video editor to view the YouTube’s library of tracks that are already approved. Browse the music by filtering or searching by genre and artist. When you identify the song you like, drag it to the timeline. Also, you can add multiple tracks by dragging them onto the timeline. The tracks cannot overlap; they can only play one after the other.
Customize Volume
The software allows you to set volume levels for each video in your project. Move the cursor over a clip in the timeline and find the volume slider. Just adjust the slider to lower or raise the volume on the video or music track.
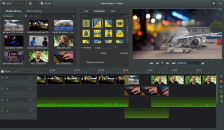
back to menu ↑Design and Interface
The YouTube video editor was initially limited when it was initially launched in 2011. Over the years, its interface and design have changed to accommodate additional video editing features and capabilities. You will enjoy using the editor on Mac and Windows and Chromebook. Even if it works on Android and iOS, it’s best you avoid using mobile devices to prevent confusion.
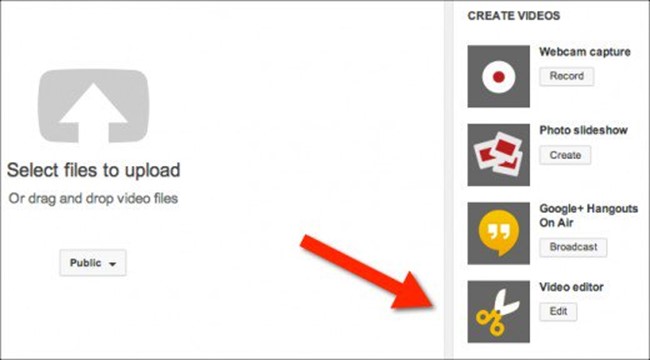
Uploading a Clip
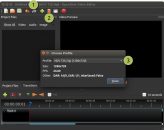
You first need to login to your YouTube account to upload the clips you want to use in the editor. To upload the clip, just click the up arrow button in the top right-hand corner of YouTube homepage. When you upload a raw footage, you need to mark it as Unlisted or Private to prevent it from being publicly searchable in the search engine and YouTube. This is because the initial film may not mean much and there might be sections you wish to remove before the clip is ready for viewing by the public. Once your videos are uploaded to YouTube, you can now go to the video editor by selecting the upload button and clicking the video editor.
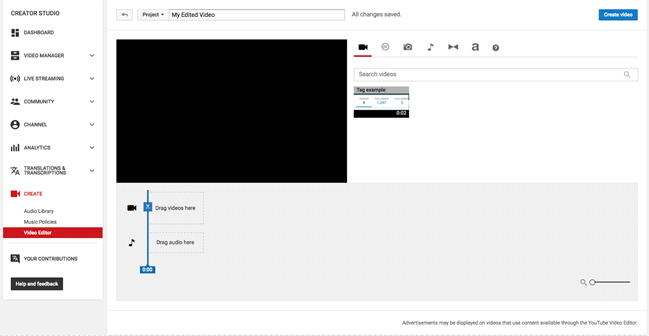
Adding and Trimming Video
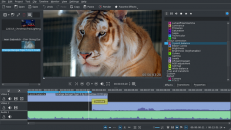
To add the videos you uploaded to the redacting timeline, find them in the media depository in the top right corner of the screen. You can click the red play button on the thumbnail to preview the content of any clip. Drag the videos you need to the timeline or hover over the thumbnail and click the “+” sign to add them. You can re-order the clips by dragging and dropping them onto different positions on the timeline. To trim the inception or end of a clip you need to first select it by clicking on it, which highlights the clip and adds a thick blue bar at its inception and end. Roll your mouse to the middle of the blue bar, then click and drag to trim the footage off the beginning or end of your selected video.
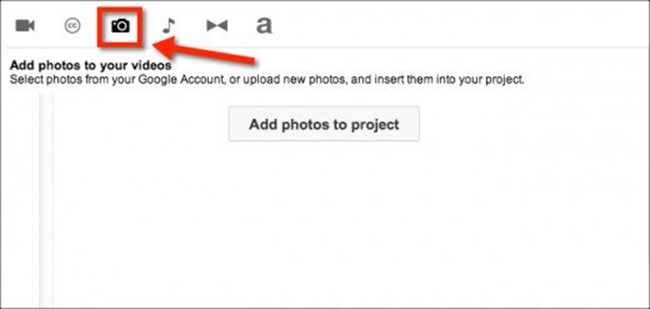
Adding Photos
You can add pictures alongside your videos to produce a mixed media production using the YouTube video editor. Select the camera sign in the editing menu, then click add photos. You can either add photos from your Google+ account or upload directly from your computer. Adding images is done just like a video. Just drag the images to where you want them to appear in the timeline and drag the bars on the right or left to control how long a photo is displayed on the screen.
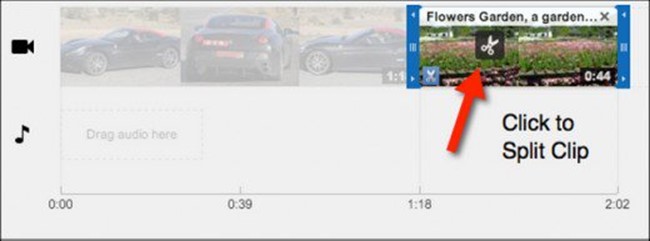
Splitting and Removing Video Clips
To split a clip at any given point, just select it by clicking on it then hover your cursor over until you see the scissors appear. Click on the scissors to see a vertical red line that you can use to scan through the video. Move the red line to the point that you want to split the video and then click the mouse again to split it into two.
Splitting a clip is great for inserting extra footage or for making cutaway scenes, but it can alternatively be applied in removing a section of a video from the middle of the clip. To remove the clip, just click the scissors icon and move the red line to the beginning of the video you want to delete and then click to make the first cut. Then drag the red line to the end of the section you want to delete and make another cut. Doing this will split the video into 3 parts. Move your mouse to the middle clip and click the “x” in the top right-hand corner of the video to remove it.
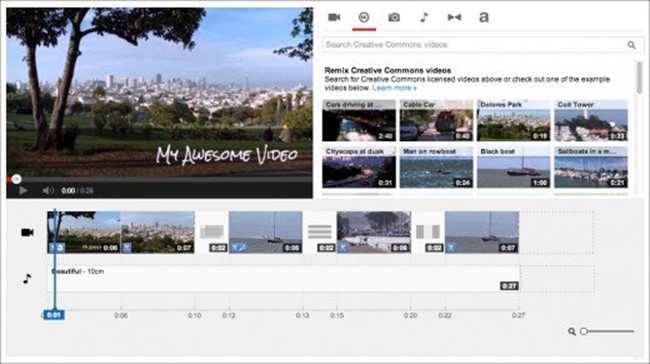
Creative Commons and Copyright
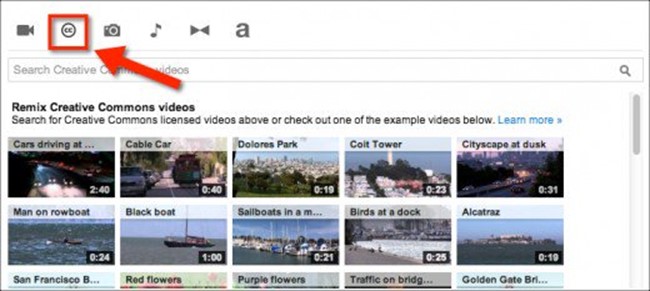
YouTube protects the content of its users from copyright infringement. If you would like to add a footage that you did not shoot yourself, you can search through YouTube’s library of videos with the Creative Commons use license. This license allows other users to use your video and edit it freely. When you upload a clip to YouTube, you get an option to associate the video with a standard license, which protects your video from copyright infringement, or the Creative Commons license.
To find the Creative Commons videos in the editor, click “CC” in the menu bar and search for keywords associated with the video you want.
Video Transitions
Video transitions make your video look professional. To put a transition, click the transitions sign in the menu and choose the type of animation you would like to apply. Then click and pull it down to the timeline and hover the mouse between the two clips that you want to separate using a transition. Release the mouse button to add the transition immediately when you see a thick blue line. The default duration of a transition is 2 seconds, but you can adjust this by moving the blue bars to either side of the transition to shorten or lengthen the transition.

Adding Text and Titles
You can add text to video clips or to the beginning or end of a project to simulate credits and titles. You can do this in the text menu by clicking the big “a” in the editing toolbar. To add text, click the “a” and select the text style you want to add then drag it to the timeline and insert at the end or beginning of your project. You have the option of customizing the text using the different fonts available.
To add text to a particular point in your video, drag the text style to the top of the clip where you want it to appear. The text will be visible on the upper part of the video and will last the duration of the clip. If you do not want the text to appear for the entire clip, first split the video then add the text to the section you want it to appear.
Video Enhancements and Filters
To get the quick fixes, click on any clip that you want to enhance and look to the right of the preview pane to see the available options. You can darken or brighten clips, stabilize or rotate video and even apply slow motion. The filters menu is situated to the right of the quick fixes and includes the option to add black and white, sepia, HDR among other effects. Just select the video you want to apply the effect to then click the effect you want to use. Click the effect to deselect it if you change your mind. 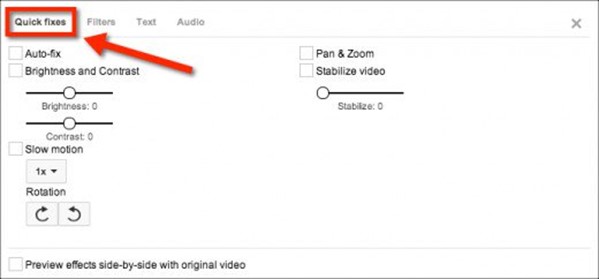
Editing Audio and Music Effects
YouTube video editor does not have great audio editing options, but there are two that are worth considering. First, you can adjust the individual sound level of a video by selecting it and clicking audio from the editing box to the right of the preview pane. This gives a slider to decrease or increase the original audio in your clip. Although you cannot add your music due to copyright infringement, you can capitalize on the YouTube’s library of free to use music.
Deselect any video by clicking outside the editor, then click the music note icon to open the YouTube free music library and search based on the genre. If you find music that you like, drag it to the audio timeline below your video clips. You can crop the end or beginning of the track the same way you trim video clips and can have many music tracks on the clip. Just place them on the timeline. Unfortunately, you cannot split a track, and there is no fade in or out for audio.